NDI Remote Operation Guide

What is NDI Remote?

NDI Remote is a software tool based on WebRTC to send NDI source image or video through WAN(Wide Area Network), so that connecters can view and monitor on the other side of the world. It is not the same way that you use local NDI protocol, which requires your devices all connected to the same network. By sending you connection line, NDI Remote is a great way to enable cloud transmission and live video production, so that you can directly manage the received NDI source on NDI Studio Monitor.


Now let’s take a look how to generate the link and receive NDI source through NDI Remote.

Step-by-Step Guidance:

Step1. Before using this NDI Remote function, you need to download the NDI Tools version 5 at [NDI.tv].

ndi tool
NDI Tools

Step 2. As you open the NDI Remote, choose My Connections, so you will see multiple remote connections, tick one of them to activate the connection. Just like the Remote Connection 1.

Step 3. To let people join your connection. Click the arrow like the Picture 1.2 to generate the link.

Picture 1.2 connection
picture 1.2

Step 4. There are 3 ways to send the link. Email it, send the QR code, or click the clipboard to copy the link and then send it through a chat later on.

Picture 1.3 remote connection
picture 1.3

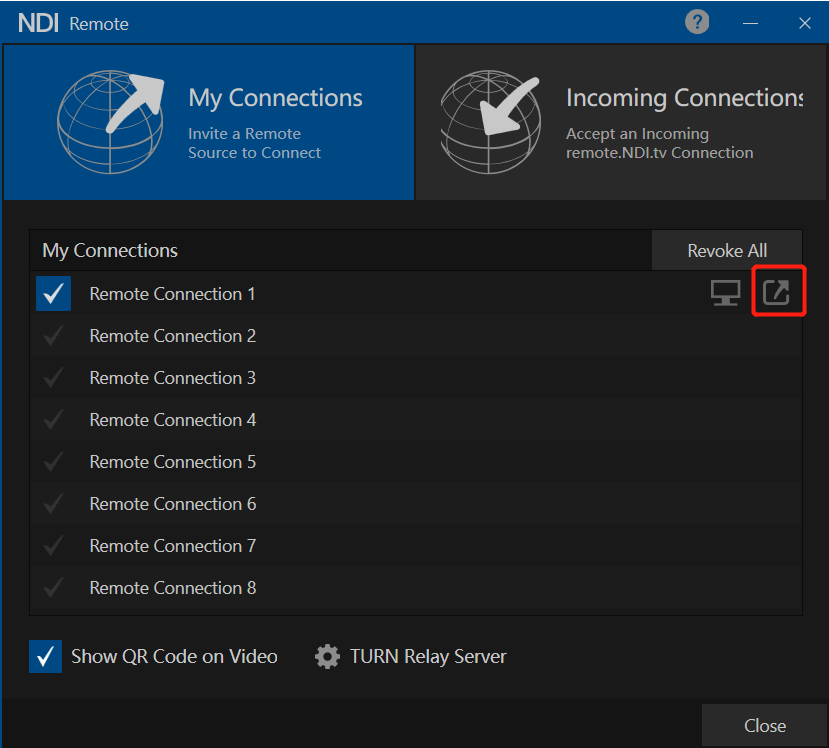
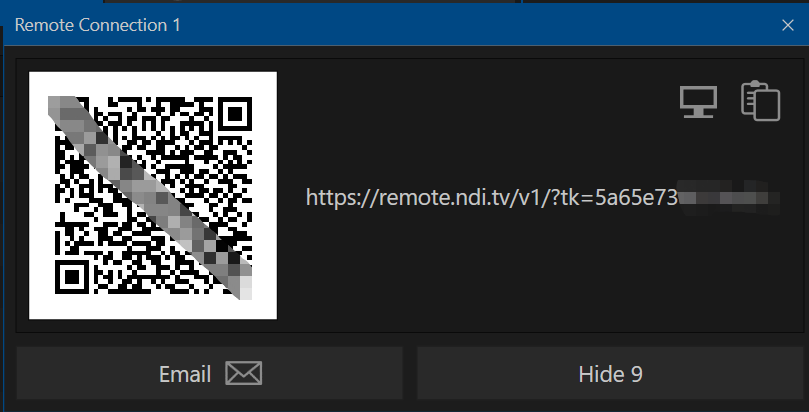
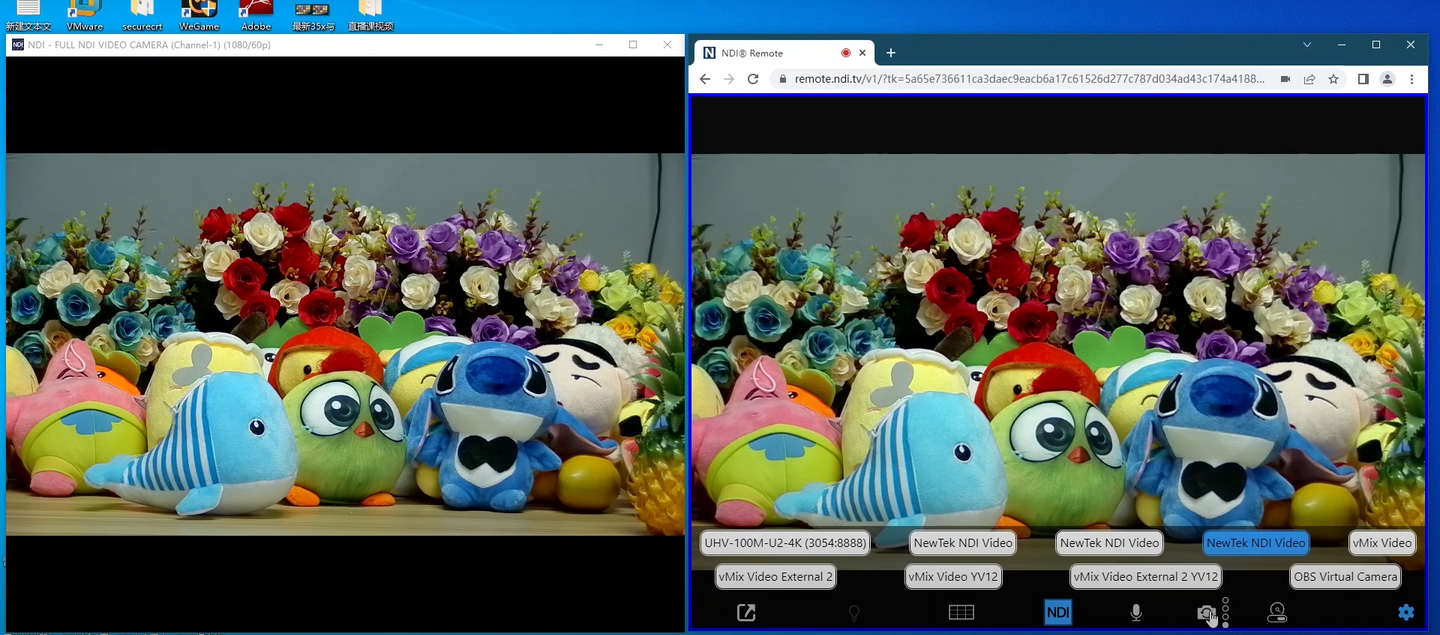
Step 5. Copy the link to your web browser on another laptop, like Google Chrome. The picture one the left is the local image captured by a Telycam NDI PTZ camera which you can see from the NDI Studio Monitor. And the picture on the right is image that’s sending through NDI Remote. By clicking the camera icon, you can switch different cameras to send different images or videos, even an OBS virtual camera. That means you can produce your video sources then send it out. What’s worth mentioning is that you can see there is a blue outline outside the NDI Remote browser, this is actually a Tally light that indicates the image is sending at this moment. If you click the NDI button at the bottom, the Tally will be off so you know you are in preview mode.

picture 1.4
picture 1.4

Step 6. The last step is go back to laptop one and see how to receive and view the broadcasting source. Clicking the little screen icon as shown in Picture 1.5, then you’ll automatically go to local Studio Motinor.

Picture 1.5
picture 1.5
NDI remote
picture 1.5

Even if your devices are in another building, city or the other side of the world, you can send your local NDI video through NDI Remote easily. And if you need multiple remote connections, just send the respective links out and it will happen all simultaneously.

To view the whole process, please check our Youtube Channel: https://www.youtube.com/watch?v=kGTE6bzEX_8

Interested in what Telycam NDI PTZ cameras can do for your next project? Contact us via sales@telycam.com for more information or an online demo.

Table of Contents

Leave a Reply

Your email address will not be published. Required fields are marked *

Related Posts

Telycam NDI PTZ camera

Best Cameras For Telemedicine  

Technology has advanced recently, improving healthcare delivery. Physicians can now treat their patients through video conferencing thanks to the advancement in telemedicine. Patients in remote

Read More »
Telycam Meet 200 With Microphones Speaker

What Is The Best Webcam?  

Either for modern homes or offices, webcams are used for multi-purposes to keep a record of everything happening between day-to-day routines. Whether you wish to

Read More »

Get in Touch